In this article we’ll Make a full blown automated algo-trading bot, without writting a single line of code! It can be a daunting task to get into automating a trading strategy even for experienced coders, but we’ll attempt to take something very complex and simplify it into something relatively simple and elegant.
Bot strategy
Let’s say that we have a simple strategy outlined in the below bullet points:
- Go long when the MACD line crosses up and over the MACD Signal line
- To go long, the latest close price must be above the 200 period Exponential Moving Average (EMA)
- Go back into cash when the MACD line crosses down and below the MACD Signal line
This sounds simple enough, but under the “hood” of this strategy, there’s actually a lot going on. Let’s visualize this strategy as a diagram.
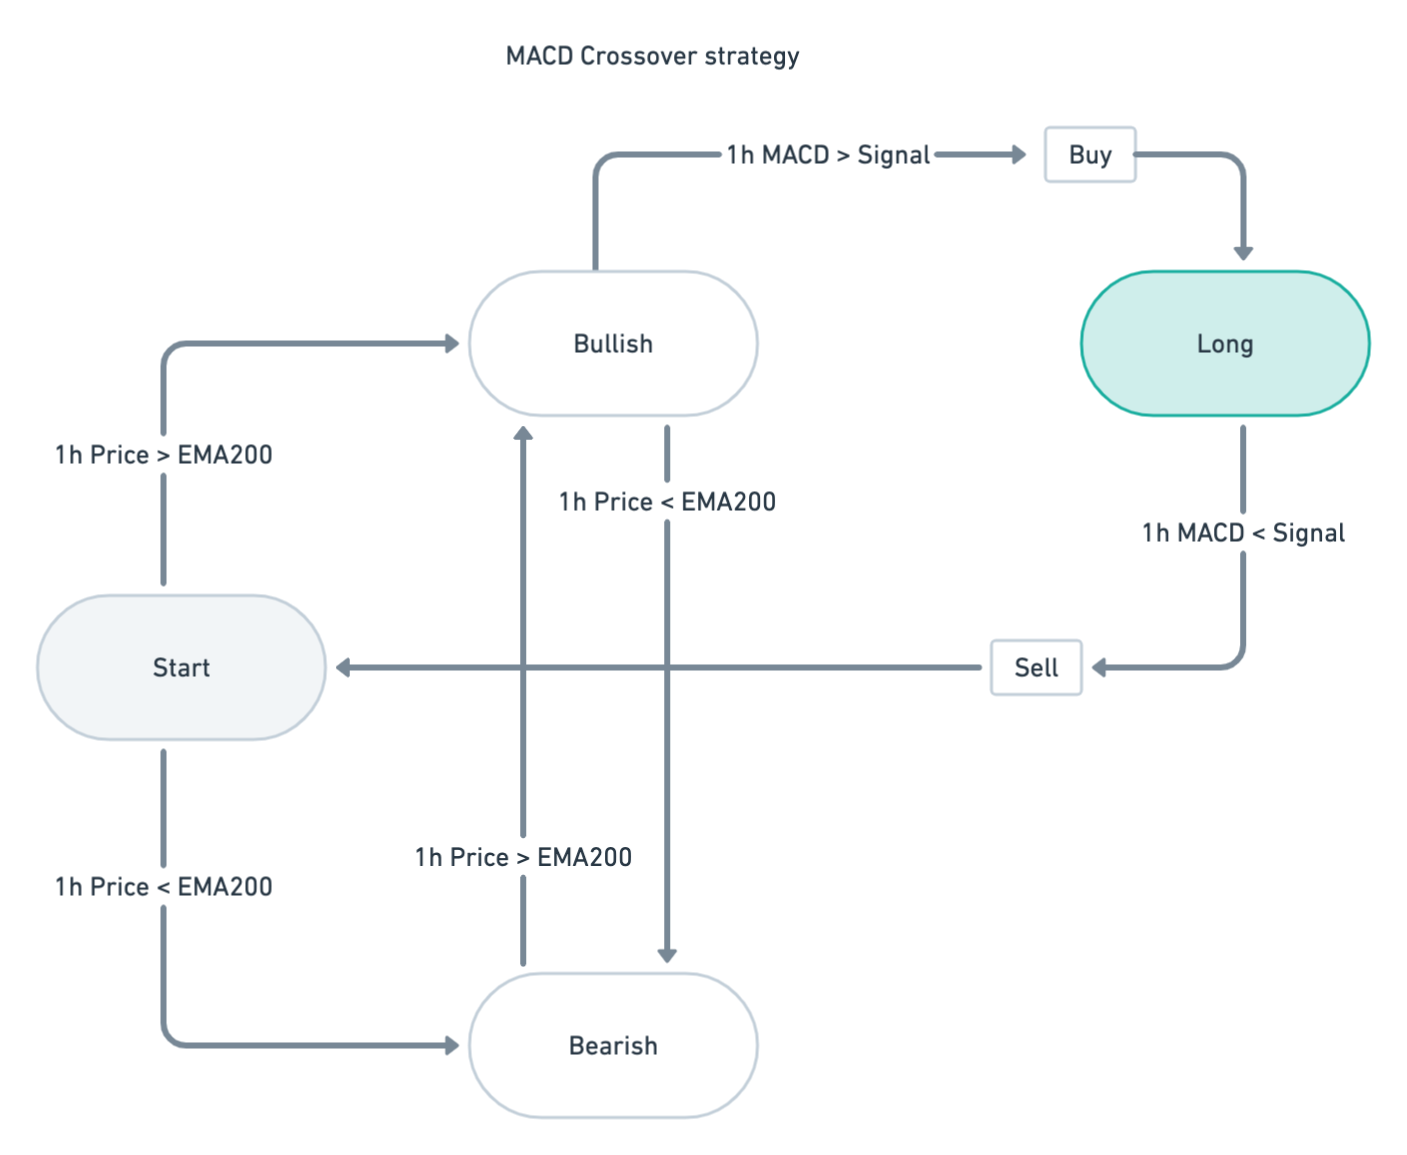
This design is a “state” based design, much like a Finite State Machine, where the bubbles are states, the arrows transitions, and the square boxes actions.
As you can see following the transitions and states in the diagram, we are always present in a particular state at any given point in time, waiting “something” to happen. Let’s say we’re in the “start” state, here we’re simply analyzing whether or not the price is above or below the 200 EMA. If it’s above, then we move on to state ‘Bullish’ waiting for the MACD line to cross up and over the Signal line or for the price to drop under the 200 EMA.
Implementation in Make
To implement the above in Make, the “visual” representation will be a little bit different. Let’s begin with the complete strategy, and break this down.
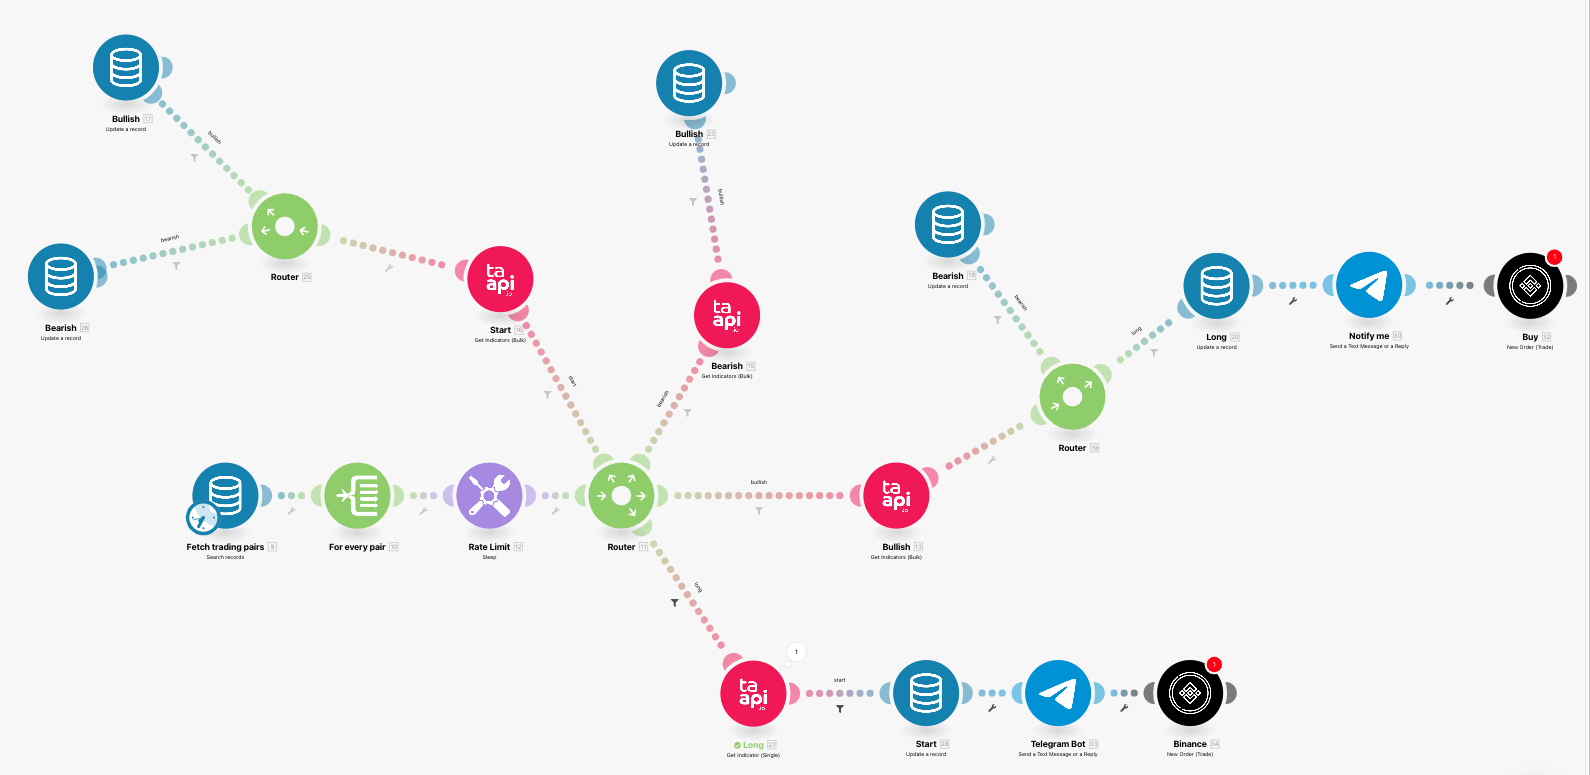
At first glance the above diagram may look daunting, but fear not, we will break this down and go through all the elements.
Trigger
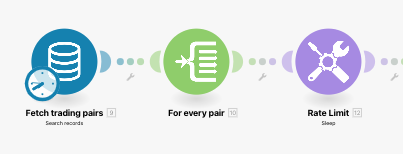
The first bubble is what’s called the “trigger”. This will start the execution of the strategy at certain intervals, this can be every minute, every 15 minutes, hourly, daily etc…
What’s happening is that we create a “Data Store”, which will hold our trading pairs that we will be trading:

At run time, this first data source bubble will fetch all our trading pairs, and pass them on what’s called an iterator, which will execute all preceding actions (bubbles) for every trading pair. And in order not to exceed your TAAPI.IO rate limits, we will put in a delay (or sleep). In this example configured to wait 1 second.
The “Logic”
The next part is where we get into the actual logic of the strategy. As you might have noticed, the database (or data store) is keeping track of the ‘state’ that we’re in. And so, depending on the state we’re currently in, we will execute the actual state in our design diagram. This means analysing the market, and getting some indicators and prices.
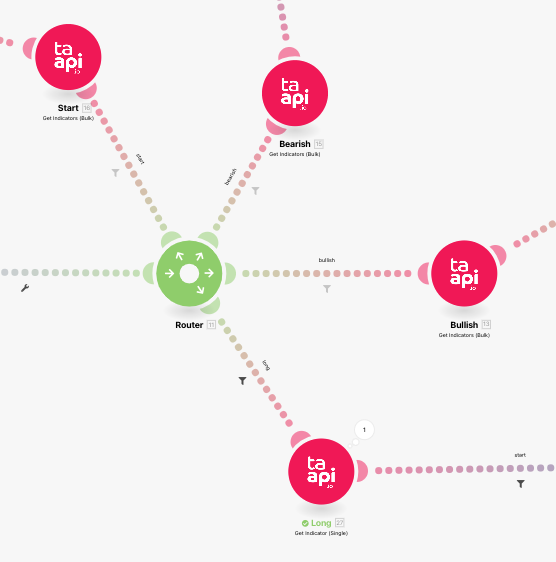
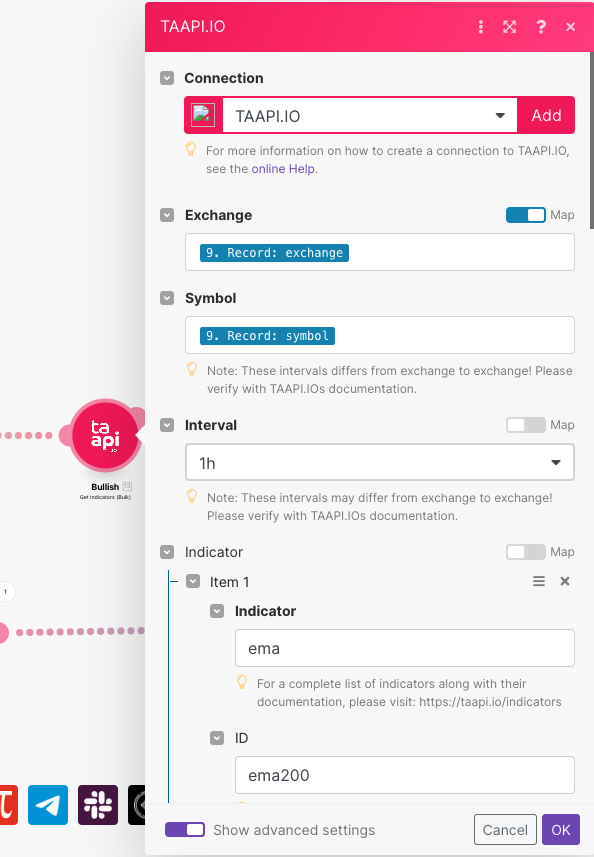
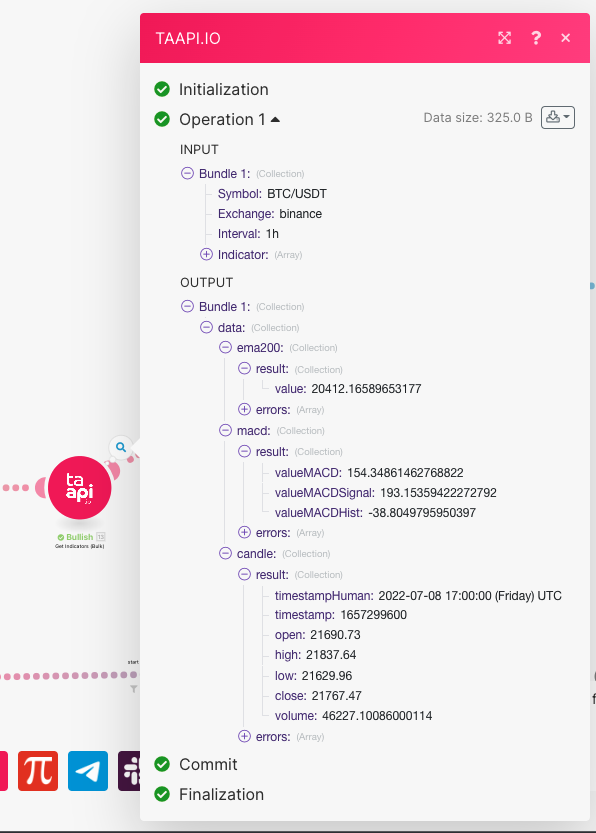
Let’s assume we’re now in the ‘Bullish’ state. In order to implement our logic, we’ll need the MACD, the EMA200 and the actual price. All latest close values on the hourly.
State change
When the “Long” TAAPI.IO “bubble” is executed, we’ll get the requested indicator values back from TAAPI.IO. We will then use these values to determine the next state change.
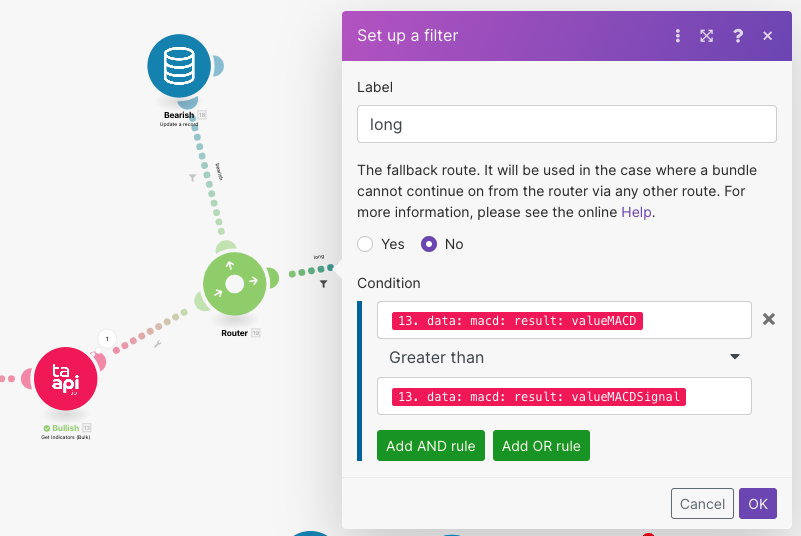
As you can see, if the MACD line is greater than the Signal line then we change state to long by updating the database to state “Long”, hereafter, we send our selves a message on Telegram that we’re now long, and finally, we place our order on Binance.
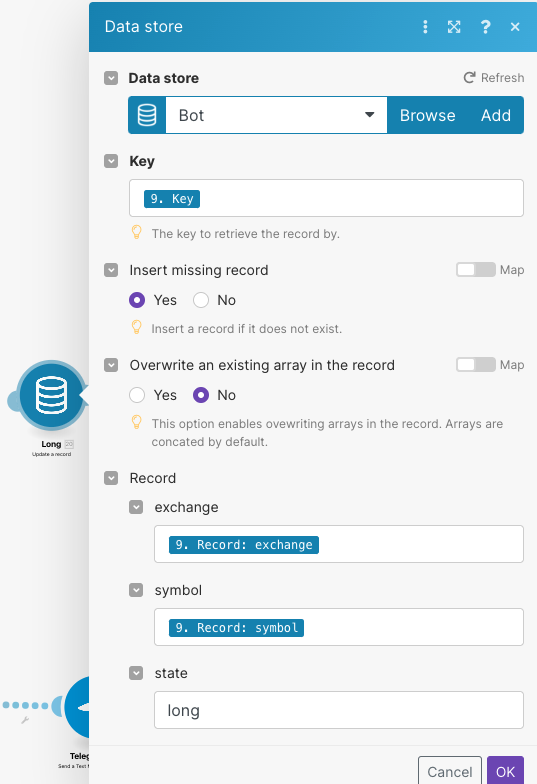
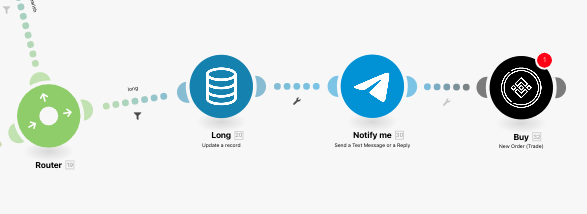
The details and integration of telegram and Binance are out of the scope of this article.
That’s it!
We’ve taken something which is fairly complex, and implemented a fully functional and automated trading bot. Needless to say, that this can be expanded to something much more complex. All without writing a single line of code.
We hope that this helps you along, so that you can start creating your own automated bots or notification systems. As always, any comments, corrections, additions are always welcome.
Happy Trading!
